Sawtooth, square, triangle, sine – if you’ve ever messed around with a synthesizer, you’ve probably seen these words or noticed the shapes that represent them.
Oscillators are at the heart of a synthesizer – without activating one, it’s more than likely that you won’t hear any sound at all. They come in different shapes, and these shapes drastically affect what you’ll hear coming out of your virtual or hardware synth. A sawtooth wave will sound appropriately very sharp, a square wave will be a bit less bright and a bit more open, and a triangle wave lies somewhere in between the sharpness of a sawtooth wave and the smooth sound of a sine wave.
So if you’re wondering what gives these waves their signature sound, I’m sorry to say that the underlying reason is… math. That’s right – all that trigonometry you studied is finally going to pay off. Remember sine waves? As it turns out, all of the complex waveforms described above can actually be traced back to this humble periodic function. Before we get to constructing one of these, let’s get a few important terms out of the way:
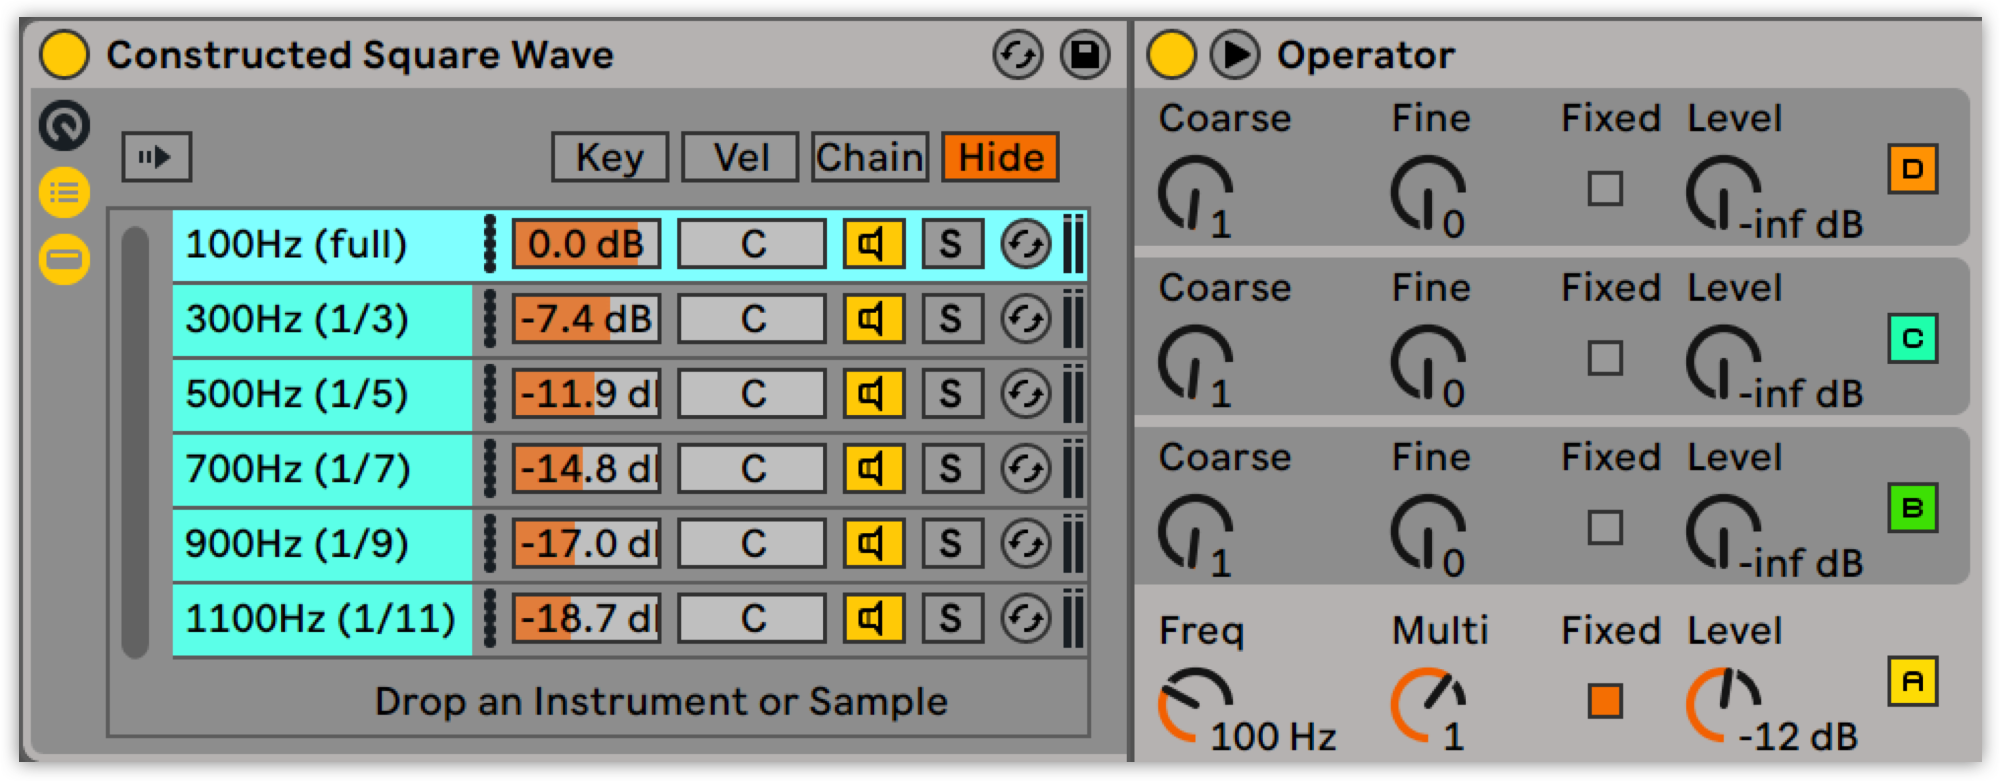
- Fundamental frequency: This is the lowest note of our wave, and all the other sine waves will be arranged based on its frequency. To make things easy, let’s set our fundamental sine wave to 100 Hz.
- Harmonic frequencies: These sine waves are multiples of the fundamental note. For example, the second harmonic of a 100 Hz sine wave will be 200 Hz, the third harmonic will be 300 Hz, and so on.
- Amplitude: By adjusting the amplitude of each of these harmonics, we can create different complex waveforms. In a DAW like Ableton Live, this is measured in decibels or dBFS, while an analog synth uses voltage.
Each complex wave described above can be created just by playing a series of sine waves at specific frequencies and amplitude levels! Let’s tackle a square wave in Ableton Live and see this magic at work. The formula for creating a square wave is as follows:
- We only want to include the odd harmonics – the third, fifth, seventh, etc. So if our square wave’s fundamental frequency is 100 Hz, we’ll also want sine waves at 300 Hz, 500 Hz, 700 Hz, and so on.
- The amplitude of these harmonics will decrease based on where they are in the series. For example, the third harmonic will only have a third of the fundamental frequency’s amplitude, and the seventh harmonic will have one seventh of the fundamental frequency’s amplitude.
That might sound a bit daunting, but let’s see (and hear) it in action. First, I opened up Live and dropped an empty Instrument Rack into a MIDI track. I then filled this rack with six separate instances of Ableton’s Operator synthesizer, and checked the box labled “Fixed,” which lets us control the exact frequency of each sine wave. The final step is to adjust the frequency and amplitude for each of the six sine waves so that they follow the relationships described above.
Here’s what it sounds like (and looks like) when you add these six sine waves on top of one another, one by one:

The sine wave slowly nears the shape of a square wave as more waves are added
Even though each wave was created separately, our brain perceives them as a single tone – and thus a complex waveform is born. This is the basic foundation behind additive synthesis, a technique for creating interesting sounds by just layering sine waves on top of one another. In the case of our square wave, the more harmonic frequencies you add, the richer the wave will end up sounding. Just compare the Square 6 wave preset in Operator, which should sound exactly like the wave you just heard, with the Square 64 preset, which will sound much more full and bright due to a few dozen more layered harmonics.
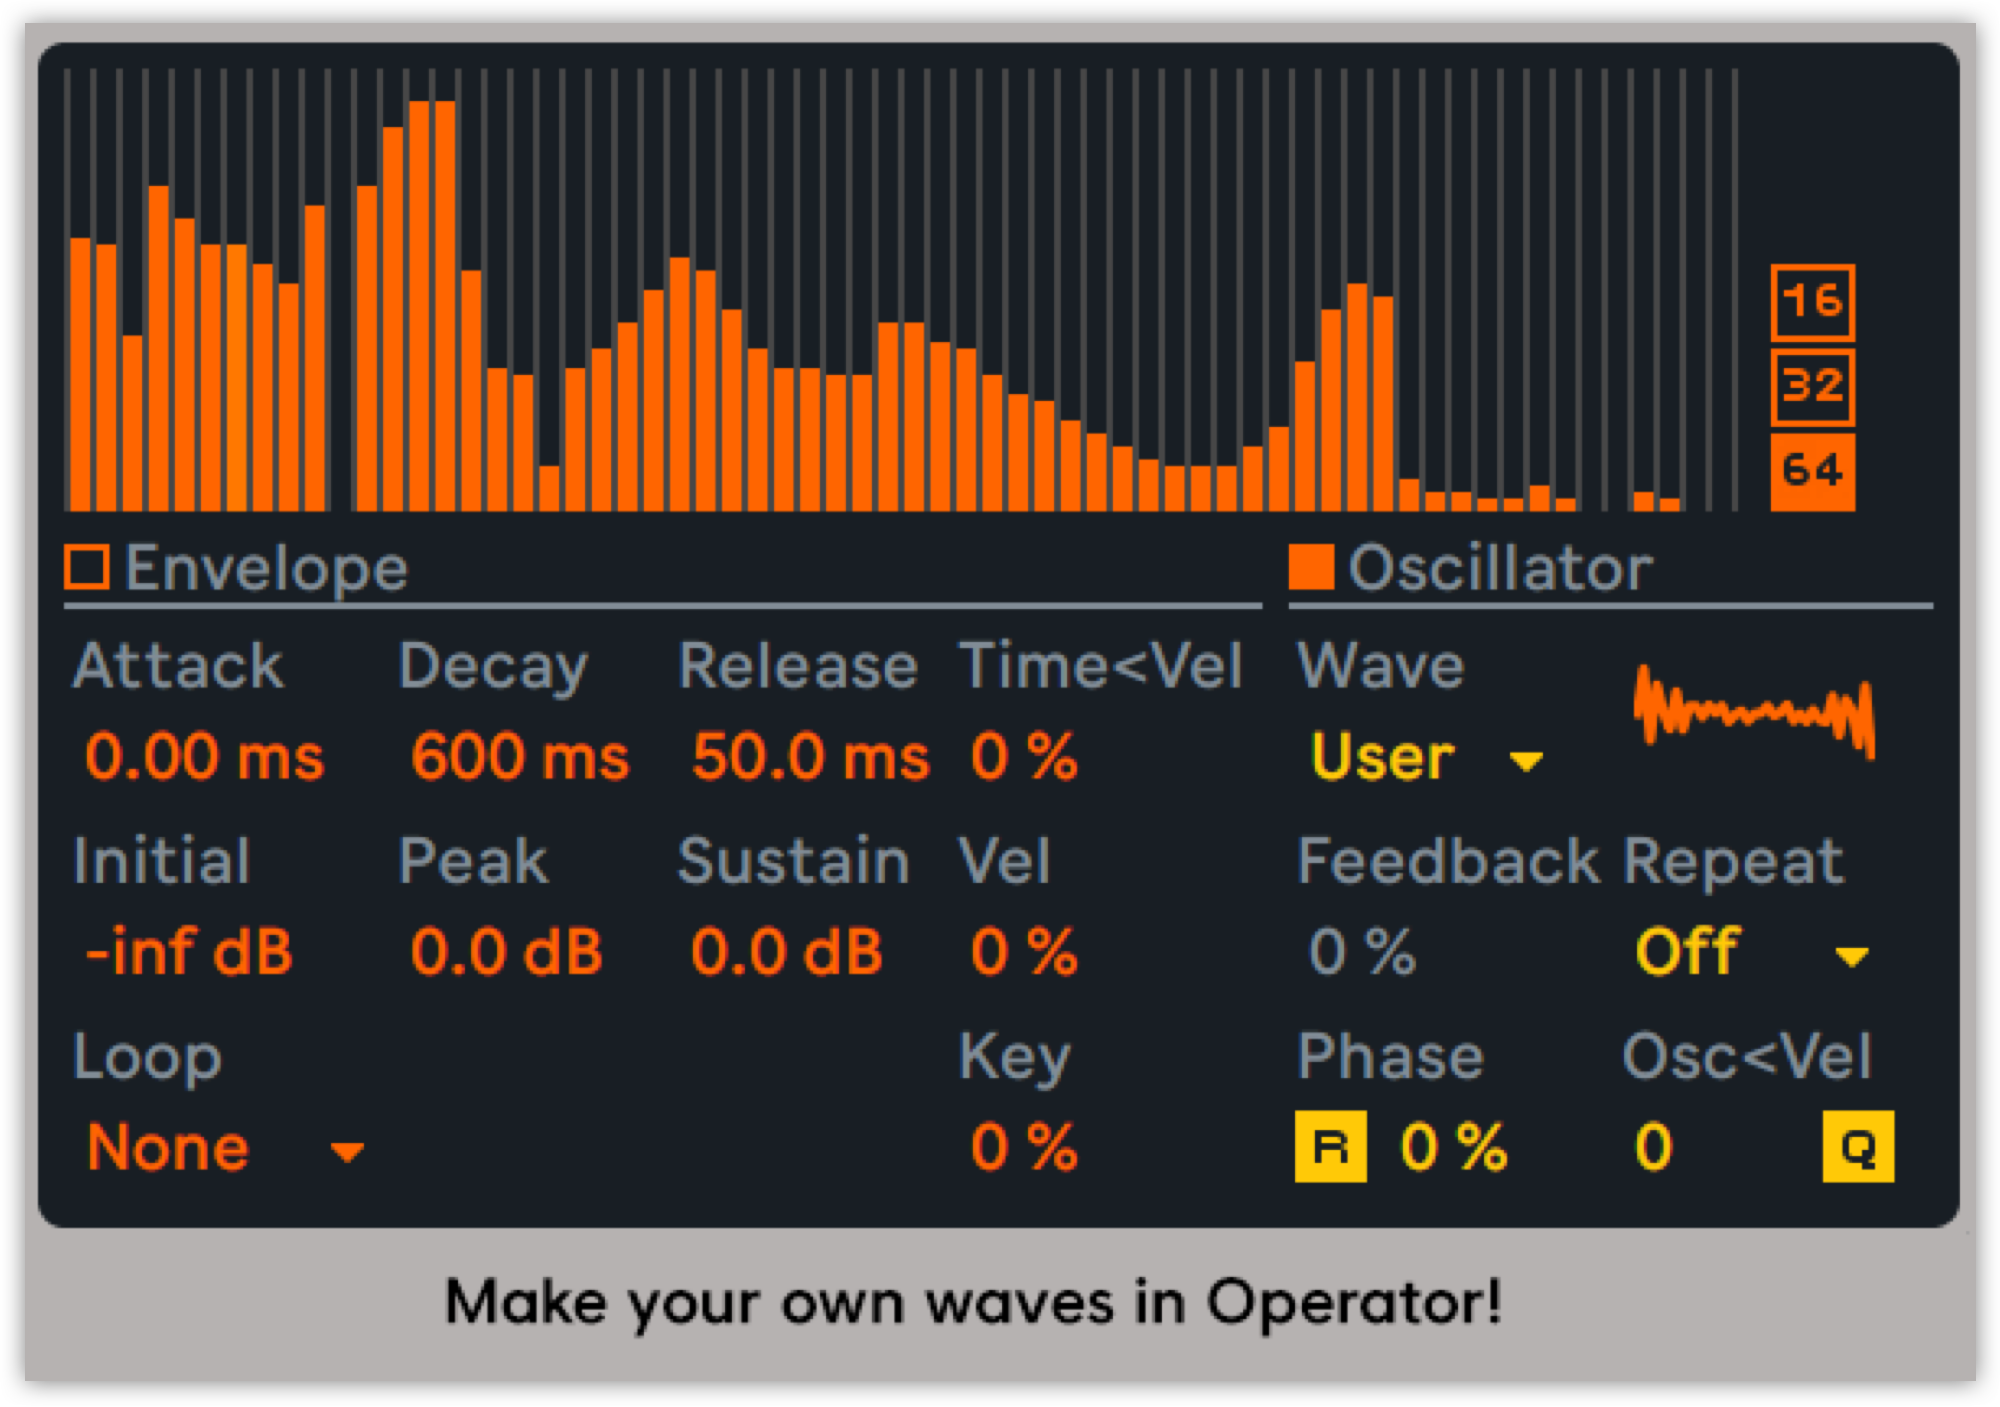
If you’d like to learn more about how different waveforms are constructed, make sure to check out the Ableton project below. I’ve included constructed versions of sawtooth, square, and triangle waves for you to mess around with. You can also quickly access an entire selection of pre-constructed waveforms under the Wave menu in the Oscillator section of Operator. This feature makes it easy to craft your own unique waveforms too – just click and drag along the graph to add, remove, and adjust the amplitude of up to 64 individual frequencies. Have fun, and don’t be afraid to get ~wavy~.
April 9, 2019