Minimal Audio is a team of artists, sound designers, and engineers who are creating next-generation software for musicians.
In this article, you’ll learn how to use their hybrid distortion plugin Rift. As expected with distortion, Rift can achieve anything from blaring fuzz to subtle warmth, but it also offers a few workflows and features that skyrocket the sound design possibilities.
Let’s get into it!
An overview of Rift
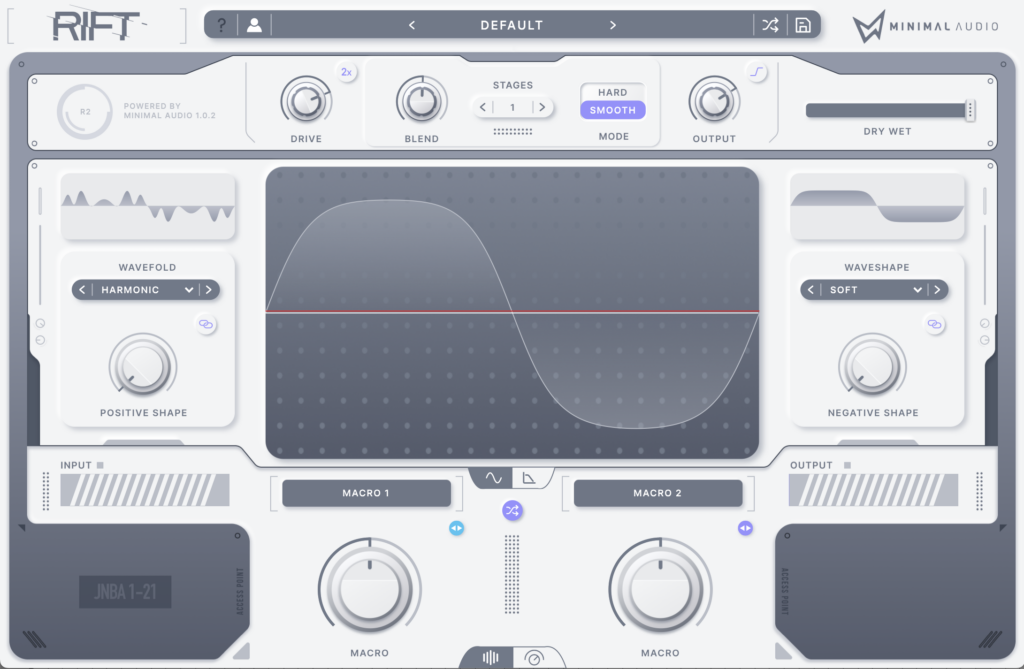
The Rift GUI has two different views: a Play View and a more detailed Advanced View. The Play View displays the main Distortion module and two assignable macros, and is great for browsing presets and quickly dialing in drive and tone.
But to fully take advantage of Rift’s unique approach to distortion, you’ll want to switch over to the Advanced View, which reveals the Feedback, Filter, and Modulation sections of the plugin, and adds a few new adjustable parameters to the top Drive and Distortion sections.
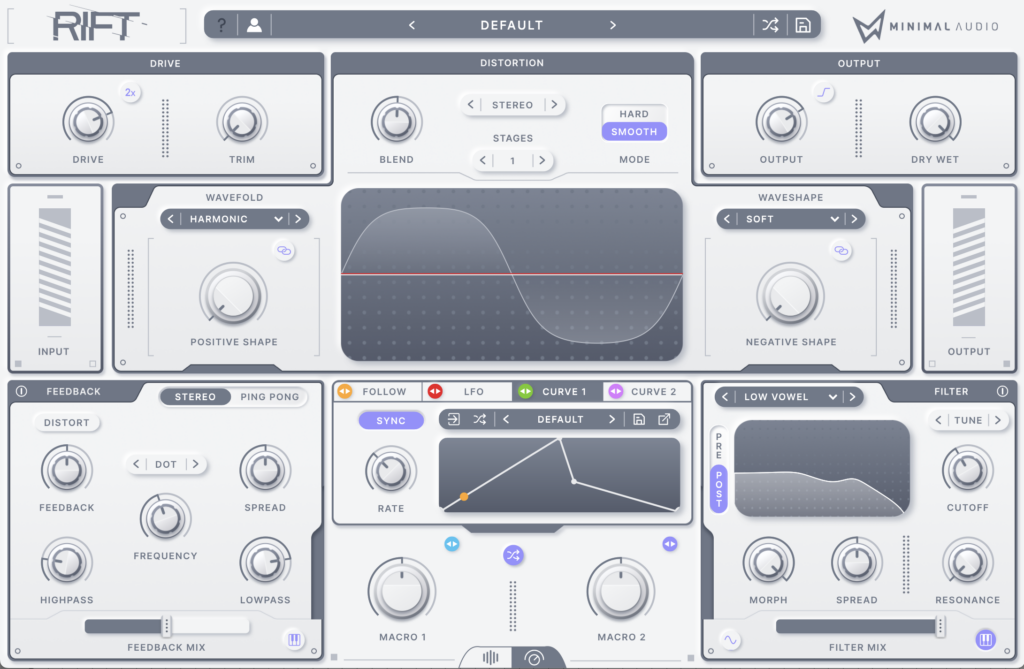
The Advanced View is where we’ll eventually get into Rift’s pitch-locking and filter-morphing abilities, but let’s start from the top and explore where most of the attitude will come from.
Distortion
The Distortion section is (understandably) in the center of the GUI. Rift uses a bi-polar distortion engine, meaning you can separately distort and shape the positive and negative polarities of the waveform, leading to an incredible level of control and flexibility. You can also catch Rift in action here, where we dive even deeper into waveshaping.
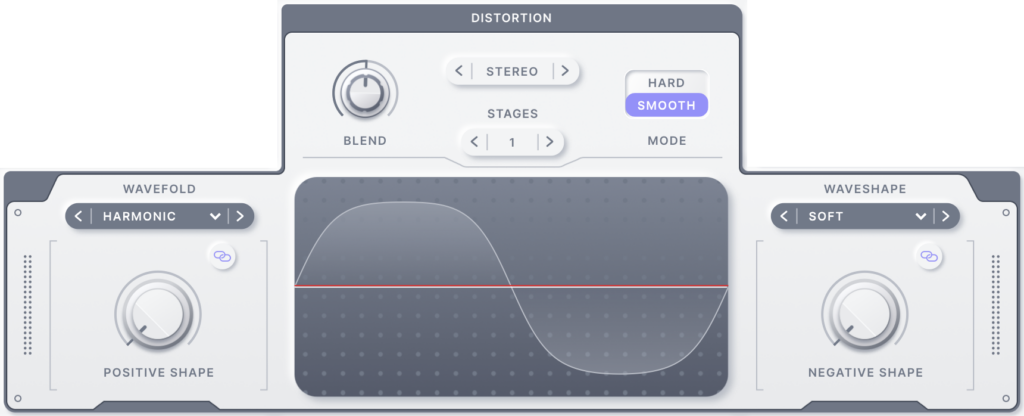
Using the drop-down menus on either side of the central oscilloscope, you can select one of five distortion types, each of which has six different algorithms.
Waveshape: Soft clipping and similar distortions that result in a saturated or overdriven sound.
- Soft, Pulse, Bounce, Vertex, Growl, Resin
Wavefold: Wavefolding distortions that result in a harmonically complex signal.
- Sine, Edge, Harmonic, Rubber, Teeth, Plexus
Noise: Distortions that dynamically generate noise and saturate the signal.
- White, Jitter, Toasted, Ghost, Retro, Optical
Bit Depth: Distortions that reduce the signal’s dynamic resolution, resulting in bright harmonics and amplitude effects.
- Quant, Maxed, Insig, Crunch, Blade, Shred
Sample Rate: Distortions that reduce the signal’s frequency resolution, resulting in aliasing and inharmonic effects.
- Redux, Tone, Cinder, Quartz, Modem, Daemon
After selecting your algorithms, you can use the Positive Shape and Negative Shape parameters to adjust the positive and negative algorithms independently. With this bi-polar approach, 30 algorithms, and the ability to morph those algorithms even further, the Distortion section alone can produce a wide range of crispy, crunchy, and distorted goodness.
Above the oscilloscope, you can find a few extra settings to keep dialing the distortion in. This includes a Blend control to adjust the balance between the positive and negative polarities, Stereo Routing options that control how Rift will process stereo signals, a Mode parameter that defines how the polarities are split (for brighter or smoother tones), and a Stages control that lets you run signal through the engine multiple times for maximum drive.
Drive and Output
Before we move on to the other sections, it’s worth noting the Drive and Output modules at the top of the plugin. The Drive section effectively lets you drive signal into the distortion harder, leading to more extreme results. You can then use the Output section after all your processing to reduce any level that you introduced, and even adjust the Dry / Wet balance for some parallel processing.

Feedback
In the bottom-left corner of Rift, you’ll find the Feedback module.
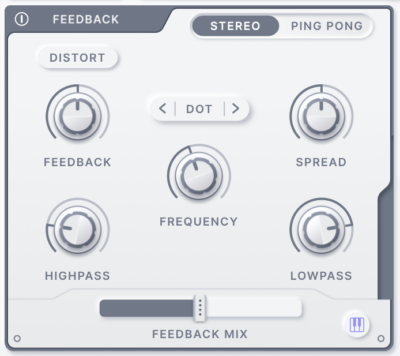
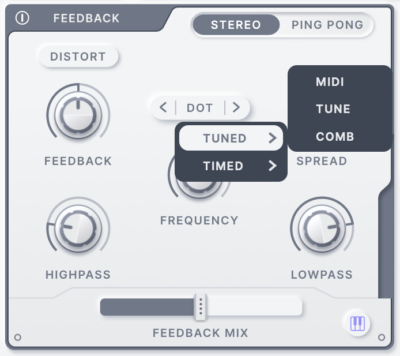
Here, the most important parameter is the Feedback Frequency Range menu in the middle, which allows you to use this module like a resonator effect or a delay effect. Choosing one of the Tuned settings will use faster feedback times and act like a resonator, while the Timed settings will act more like a delay.
Regardless of whether you go the resonator or delay route, the remaining parameters all work about the same. You can set the feedback to play in Stereo or Ping-Pong. The Distort button feeds the feedback chain back through the Distortion section from above. Feedback adjusts the feedback amount, or how much the signal is fed back into itself. Spread separately adjusts the left and right channels, creating some stereo separation and interesting stereo effects. The Highpass and Lowpass controls perform basic filtering to the feedback chain. The Feedback Mix fader adjusts the Dry / Wet balance. And lastly, the central Frequency parameter pans across the range set in the Feedback Frequency Range menu.
If you’ve selected a Timed range, the Frequency knob will pan through different rhythmic subdivisions for your delay. Alternatively, you can use the Free range to adjust your delay to the millisecond.
The Tuned ranges, on the other hand, all act a bit differently. Comb lets you apply comb filtering for flanger-like effects by using the knob to adjust the cutoff frequency. Tune pitches the feedback to a specific note, and MIDI allows you to use a MIDI input to pitch the feedback on-the-fly.
You’ll notice a little button with some piano keys hiding out in the bottom-right of the module. This is the Frequency Pitch Snap button, which lets you limit the notes that the Frequency control can select in the Tune and MIDI modes. You can individually select the notes you want, or you can select from a wide menu of scales to automatically set those notes.
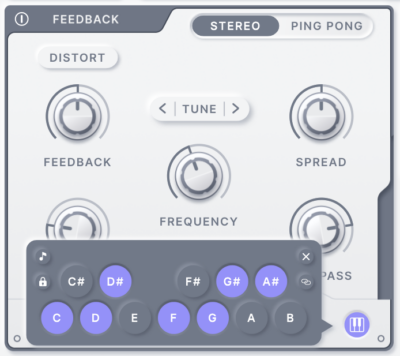
If you’ve selected the key of your track, the feedback chain will now resonate in-key with your track, regardless of where you set the Frequency control. When you pair this with automation (or with internal modulation), it can reveal brand-new melodic ideas that you might not have found otherwise (like at around 0:30 of the video below).
Filter
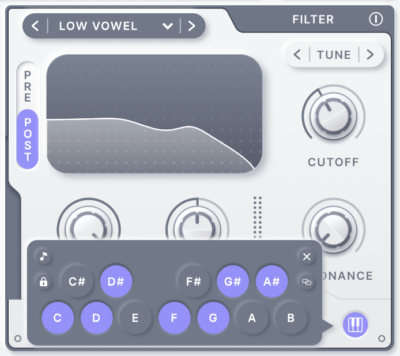
In the bottom-right corner of Rift’s UI, you’ll find the Filter section.
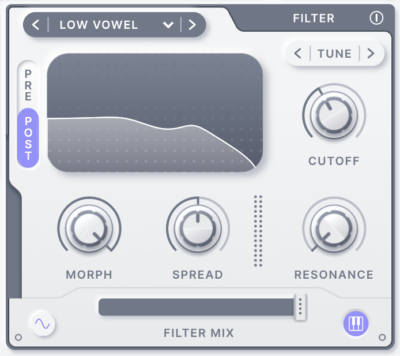
Similar to the Distortion Type drop-down menus in the Distortion section, there’s a Filter Type drop-down where you can select one of four filter types, each of which has six different shapes.
Basic: Standard 24 dB filters.
- Low Pass, High Pass, Band Pass, Notch, Dual Notch, Peak
Morph: Filters that smoothly morph between types.
- Classic, Crest, Bass, Shifty, Transfer, Scatter
Peaking: Filters that use peaks and notches to create formant and phaser effects.
- Vari Notch, Mid Vowel, Low Vowel, Phaser, LP Phaser, Flutter
Harmonic: Filters that are based on harmonic structures and mathematical series.
- Snarl, Howl, Overtone, LP Scan, Peak Scan, BP Scan
Using the Morph knob below, you can adjust the shape of the Morph, Peaking, and Harmonic filters, either to dial in the sound you’re looking for or to add extra movement using modulation or automation.
Like the Feedback module’s Feedback Frequency Range and Frequency controls, the Filter module has Filter Cutoff Range and Cutoff controls. And like the controls in the Feedback module, Filter Cutoff Range determines how the Cutoff control acts.
This time, there are three options: Hz, which sets Cutoff in standard Hz values, and Tune and MIDI, which act the same as in the Feedback module. Notice that the Filter module also has a Pitch Snap option, which can be used in the Tune or MIDI modes to set the filter cutoff frequency to notes in a certain scale.
The Spread parameter also acts a lot like its counterpart in the Feedback section, but now it separately adjusts the Cutoff frequency in the left and right channels, again creating interesting stereo differences and an illusion of width.
The Filter module also has a Resonance control, a Dry / Wet Mix fader, the ability to set the filter Pre- or Post-distortion, and a little control that allows you to add some Amp Modulation for denser harmonic content.
Modulation
And lastly, in the center of the Rift UI below the Distortion section, we have a few options to apply internal modulation to animate nearly any parameter in Rift.
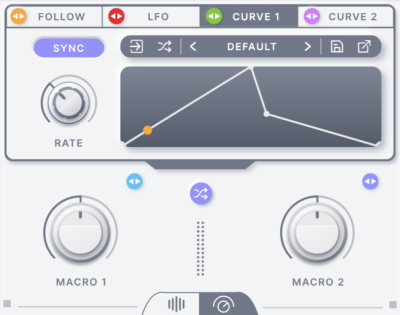
We’ve already mentioned the two macro knobs that are visible in the Play View, which are great for long-form automation of multiple parameters.
Rift features three main modulation types: Follow, LFO, and Curve (of which there are two instances). Follow acts like an envelope and is triggered by the input signal itself, meaning it’ll dynamically react to the changing intensity of a strummed guitar, drum kit, or other signal. We can use this modulation source to create internal modulation that mirrors the original sound itself.
The LFO source allows you to apply a basic LFO shape as a modulation source. This can be free-timed or synced to the tempo of your track, and you can even use the Randomize fader to take things beyond the basic LFO shapes.
But if you want to create longer or more complex phrases than a simple LFO, the Curve sources are where you’ll want to turn. Rift features an in-depth Curve Editor that allows you to design complex repeating curves that can introduce new grooves to your track. Plus, Rift comes stocked with curve presets in case you want to get some inspiration or find a starting point.
Go supercharge your tracks with Rift
As you can see, Minimal Audio’s Rift takes a super malleable approach to distortion and waveshaping, letting you dial in unique distortion tones and create movement with powerful internal modulation. Hopefully this feature guide helps you get started, but if you have a question, feel free to leave it in the comments below.
Try Rift for free, and then Rent-to-Own the plugin for $4.99/mo until you own it outright:
November 15, 2021